Step-by-Step Guide: How to Remove an Integrated Dishwasher – Tips and Tricks


Removing an integrated dishwasher from your furniture can be a daunting task, but there are ways to make the process easier. In this step-by-step guide, we will show you how to locate and access the dishwasher, disconnect it from the plumbing and electrical connections, and safely remove it from its built-in position.
Before you begin, it is important to note that removing an integrated dishwasher is not a project for everyone. If you are not comfortable working with electrical and plumbing connections, it may be best to hire a professional. However, if you are up for the challenge, let’s get started!
Step 1: Lower the dishwasher door and unplug it from the power source. This can usually be done by switching off the power at the circuit breaker or unplugging the dishwasher from the wall. You should also turn off the water supply underneath the sink.
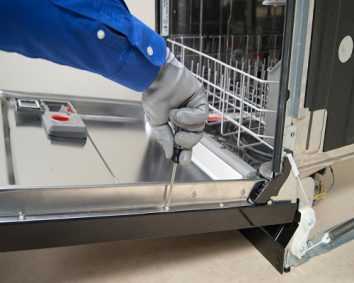
Step 2: Remove the two screws that secure the dishwasher to the countertop. These screws are usually located on the sides or top of the dishwasher door. Once the screws are removed, the dishwasher should be free from the countertop.
Step 3: Open the dishwasher door and remove the lower access panel. This may involve using a screwdriver or a wrench to loosen the screws or fittings. Once the panel is removed, you will have access to the remaining connections.
Step 4: Disconnect the dishwasher’s electrical and plumbing connections. The electrical connections can usually be unplugged, while the plumbing connections may involve unscrewing the drain line or the water supply line. Be sure to have a towel handy to catch any water that may have remained in the lines.
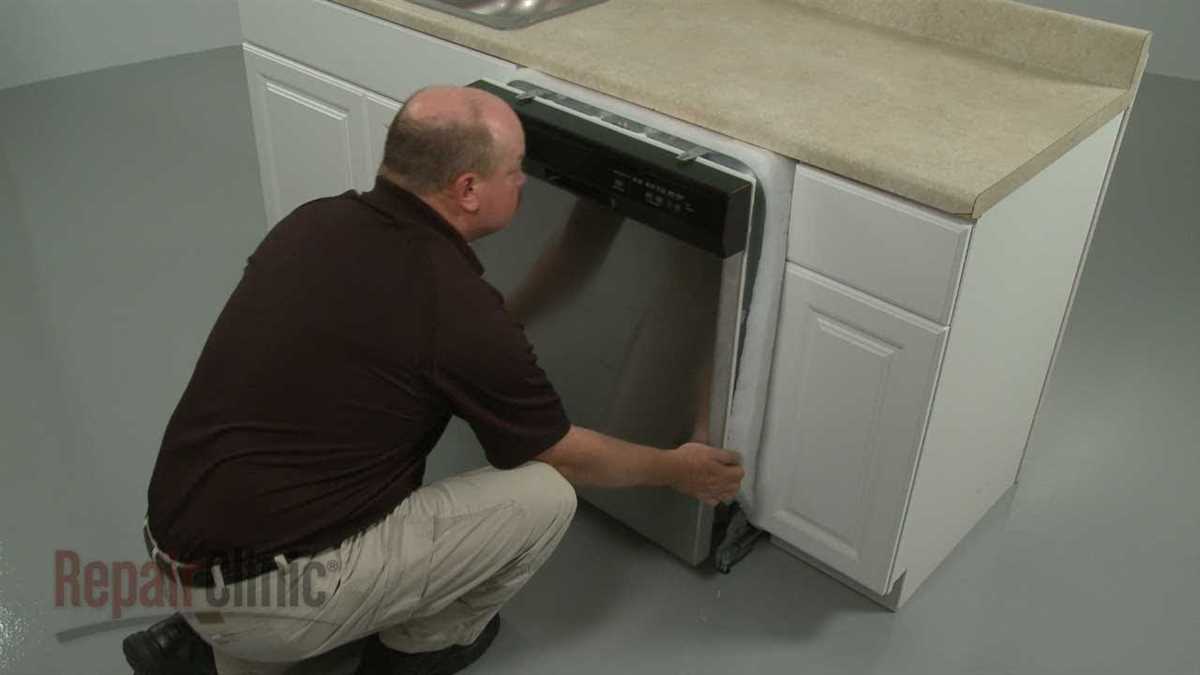
Step 5: Once all the connections are removed, you can now lift the dishwasher out of its built-in position. Be careful not to damage any surrounding cabinets or the dishwasher itself.
Now that you know how to remove an integrated dishwasher, you can address any repairs or replacements that need to be made. Don’t forget to dispose of the old dishwasher in an environmentally-friendly way, such as recycling or taking it to a local recycling centre.
Although this guide provides a general overview, it is important to note that the uninstallation process may vary depending on the make and model of your dishwasher. If you are unsure about any step or encounter any difficulties, it is always best to call a professional for assistance. Remember, safety should always be your top priority when working on any home improvement project.
And there you have it! A step-by-step guide on how to remove an integrated dishwasher from your furniture. We hope this guide has been helpful and that you are now well-equipped to tackle this DIY project.
Prepare the Necessary Tools

- Gather all the tools you will need before starting the removal process to ensure a smooth and efficient operation.
- If you’re not familiar with the various components of an integrated dishwasher, it’s best to familiarize yourself with them before proceeding.
- Here are some tools you may need:
| Tools | Usage |
| Towels | Use towels to protect your flooring and countertops during the removal process. |
| Screwdriver | You will likely need a screwdriver to uninstall any screws or panels holding the dishwasher in place. |
| Adjustable Wrench | Use an adjustable wrench to remove any clamps or fittings connected to the dishwasher. |
| Plumbers Putty | If you need to remove a fitting or sink that is connected to the dishwasher, plumbers putty can help to create a water-tight seal once reinstalled. |
| Compression Fitting | Some dishwasher models may require a compression fitting to connect the water supply line. |
| Helper | Having an extra set of hands can make the removal process much easier and safer. |
Make sure you have all the necessary tools within reach before starting the removal process. This will save you time and frustration, and ensure that you have everything you need to complete the job.
Shut off the Power Supply
Before beginning the process of removing an integrated dishwasher, it is important to ensure that the power supply is turned off. This is crucial for your safety, as working with live electrical connections can be dangerous.
Follow these steps to shut off the power supply:
- First, disconnect the unit from the power source. Locate the plug or switch that controls the power to your dishwasher and unplug it.
- Next, switch off the circuit breaker that supplies electricity to the dishwasher. This will prevent any accidental electrical shock while working on the unit.
- After the power supply is entirely shut off, it is safe to proceed with the removal process.
Remember, safety should always be your top priority when working with electrical equipment.
Turn off the Water Supply
Before you begin uninstalling your integrated dishwasher, it’s important to turn off the water supply. This step is crucial to ensure that you can safely disconnect the appliance without any water leakage or damage to your kitchen fixtures.
- Locate the water supply valve, which is usually positioned underneath the sink or behind the dishwasher.
- Turn the valve clockwise to shut off the water supply.
- If there is a compression fitting or cover over the valve, use pliers or a wrench to loosen it and remove it to access the valve.
- Double-check that the water supply is completely shut off by turning on the faucet and confirming that no water flows out.
By turning off the water supply, you ensure a safe and dry environment for disconnecting and removing your integrated dishwasher.
Disconnect the Drain Hose

Disconnecting the drain hose is an important step in removing an integrated dishwasher. Follow the steps below to safely disconnect the drain hose:
- Before beginning any work, make sure to shut-off the power supply to the dishwasher. This can be done by turning off the appropriate circuit breaker or unplugging the dishwasher from the electrical outlet.
- If the dishwasher has been recently used, allow it to cool down before proceeding.
- If there is any water in the dishwasher, make sure to dispose of it properly. You can use a bucket or towel to catch the water as you pull the drain hose out of its position.
- Next, locate the junction box on the bottom of the dishwasher. This is where the drain hose connects to the machine. Depending on the make and model of your dishwasher, the junction box may be easily accessible or hidden underneath other components.
- If the junction box is covered, you may need to remove some components or screws to gain access to it. Follow the manufacturer’s instructions or refer to the dishwasher’s user manual for specific guidance.
- Once you have found the junction box, you should see a fitting where the drain hose is connected. You may need to use pliers or a screwdriver to loosen the fitting.
- Before disconnecting the drain hose, place a bucket or towel beneath it to catch any remaining water that may come out.
- Carefully detach the drain hose from the fitting. Pull it out gently to avoid any damage to the hose or the dishwasher. Make sure to hold the hose upright to prevent any water from spilling.
- Once the drain hose is disconnected, you can either leave it attached to the dishwasher or remove it completely. If you plan to reuse the dishwasher or have it repaired, it is best to keep the drain hose securely in place. If you are disposing of the dishwasher, you can remove the drain hose for recycling or proper disposal.
- If you are unsure about any steps or facing difficulty, it is recommended to consult a professional technician for assistance. They will have the necessary expertise and tools to safely uninstall the integrated dishwasher.
Once the drain hose is disconnected, you can proceed with removing other related components such as the mounting brackets, water supply lines, and wiring. These steps will vary depending on the specific dishwasher model and installation. Remember to follow the manufacturer’s instructions or consult a professional technician for guidance if needed.
Loosen the Compression Fitting
To begin the process of removing an integrated dishwasher, you will need to disconnect the water supply. This is a simple repair that can be done by most homeowners, but if you are unsure or uncomfortable with the process, it is best to call a professional for assistance.
Before you can loosen the compression fitting, make sure the dishwasher is turned off and unplugged. This will ensure that there is no electricity running to the machine and reduce the risk of injury.
- Start by locating the compression fitting. This is usually located under the sink or in a nearby cabinet.
- Once you have located the fitting, place a towel underneath it to catch any water that may spill.
- If there are any tools or objects obstructing access to the compression fitting, remove them now.
- Using a wrench, turn the compression fitting counterclockwise to loosen it. Be careful not to apply too much pressure, as this may cause the fitting to break or damage the surrounding area.
- Once the compression fitting is loose, use your hands to unscrew it the rest of the way. You may need to use a wrench to help loosen it if it is stuck.
- If there is still water in the lines, use a towel to soak up any remaining water.
- Once the compression fitting is removed, dispose of it properly. You can check your local guidelines for how to properly dispose of appliances.
In conclusion, loosening the compression fitting is a necessary part of the process to uninstall an integrated dishwasher. Following these instructions will help you disconnect the water supply and remove the dishwasher safely and effectively. If you are unsure or uncomfortable with this process, it is best to seek the help of a professional.
FAQ
Why would I want to remove an integrated dishwasher?
There are several reasons why you might want to remove an integrated dishwasher. One common reason is when you are remodeling your kitchen and need to replace the dishwasher with a new one. Another reason is if the dishwasher is malfunctioning and needs to be repaired or replaced. Additionally, removing the dishwasher can give you more space in your kitchen if you no longer need it.
What tools do I need to remove an integrated dishwasher?
To remove an integrated dishwasher, you will need a few basic tools. These include a screwdriver, pliers, adjustable wrench, and a socket wrench. You may also need a flashlight to help you see in tight spaces. Additionally, it’s a good idea to have a bucket or towels handy to catch any water that may spill during the removal process.
Can I remove an integrated dishwasher on my own, or do I need professional help?
Removing an integrated dishwasher is a fairly straightforward process that can usually be done by a homeowner. However, if you are not comfortable working with plumbing or electrical connections, it may be best to hire a professional to assist you. Additionally, if you are unsure about any aspect of the removal process, it’s always a good idea to seek professional help to avoid any damage or injury.
How long does it take to remove an integrated dishwasher?
The time it takes to remove an integrated dishwasher can vary depending on your level of experience and the specific model of dishwasher you are working with. On average, the process can take anywhere from 30 minutes to an hour. However, if you encounter any issues or complications during the removal process, it may take longer.
Are there any safety precautions I should take when removing an integrated dishwasher?
Yes, there are several safety precautions you should take when removing an integrated dishwasher. First, always make sure to turn off the power supply to the dishwasher by switching off the circuit breaker or unplugging it from the wall. It’s also important to shut off the water supply and disconnect any water lines before removing the dishwasher. Additionally, wearing protective gloves and safety glasses is recommended to avoid any injuries.