
How to Pre-Treat Stains Before Washing: A Step-by-Step Guide


Stains are a common laundry woe that can sometimes seem impossible to remove. However, with the right pre-treatment, you can significantly increase your chances of getting rid of those pesky stains before they set in permanently. Whether it’s a coffee spill, grease mark, or grass stain, taking the time to pre-treat stains before washing can save you from disappointment and keep your clothes looking fresh and clean.
Pre-treating stains involves applying a cleaning solution directly to the stained area before tossing the garment into the washing machine. This step is crucial because it helps to break down the stain and loosen its grip on the fabric, making it easier to remove during the wash cycle. Additionally, pre-treating stains can help prevent them from spreading or becoming set-in, which can make them even more difficult to remove.
When it comes to pre-treating stains, there are a few key steps to follow. First, identify the type of stain you’re dealing with. Different stains require different cleaning solutions and techniques, so it’s important to know what you’re working with. Once you’ve identified the stain, choose an appropriate pre-treatment method. This could be as simple as applying a liquid laundry detergent directly to the stained area or using a specialized stain remover product.
After applying the pre-treatment solution, give it some time to work its magic. Allow the solution to sit on the stain for at least 10-15 minutes, or longer for tougher stains. This will give the cleaning agents in the solution enough time to break down the stain and lift it from the fabric. Once the pre-treatment time is up, check the stained area to see if the stain has lightened or disappeared. If it has, you can proceed to wash the garment as usual. If the stain is still visible, you may need to repeat the pre-treatment process or try a different method.
Pre-treating stains before washing may require a bit of extra time and effort, but the results are well worth it. By taking the time to properly pre-treat stains, you can increase your chances of completely removing them, saving your favorite clothes from an untimely demise. So the next time you’re faced with a stubborn stain, remember the importance of pre-treatment and give your laundry the extra care it deserves.
Pre-Treating Stains Before Washing
Pre-treating stains before washing your clothes is a crucial step to ensure their removal. Whether it’s a food spill, dirt, or grease, taking the time to pre-treat stains can make a significant difference in the outcome of your laundry.
What You Will Need
Before you get started, gather the following materials:
- Stain remover or laundry detergent
- A clean cloth or sponge
- A basin or sink
- Cold water
Step-by-Step Guide to Pre-Treat Stains
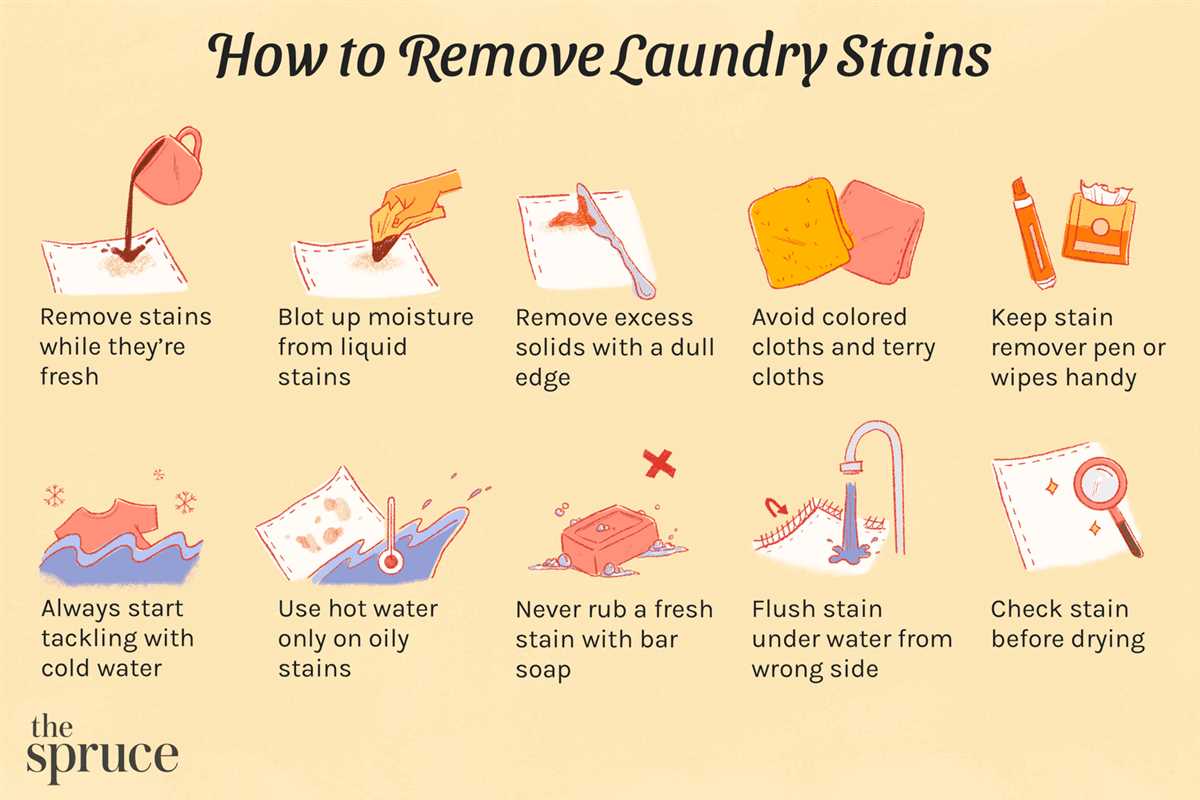
- Identify the Stain: Take a close look at the stain and determine its nature. This will help you choose the appropriate stain remover or laundry detergent for pre-treatment.
- Prep the Stain: If the stain is dry, gently scrape off any excess residue using a dull knife or spoon. Be careful not to spread the stain further.
- Apply the Stain Remover: Apply a small amount of stain remover or laundry detergent directly onto the stain. Make sure to follow the instructions on the product label. Alternatively, you can create a pre-treatment solution by diluting laundry detergent with water.
- Gently Rub the Stain: Using a clean cloth or sponge, gently rub the stain in a circular motion. Be careful not to scrub too vigorously, as this may damage the fabric.
- Let it Sit: Allow the stain remover or laundry detergent to penetrate the fabric and break down the stain. The recommended time may vary depending on the product, so check the instructions for guidance.
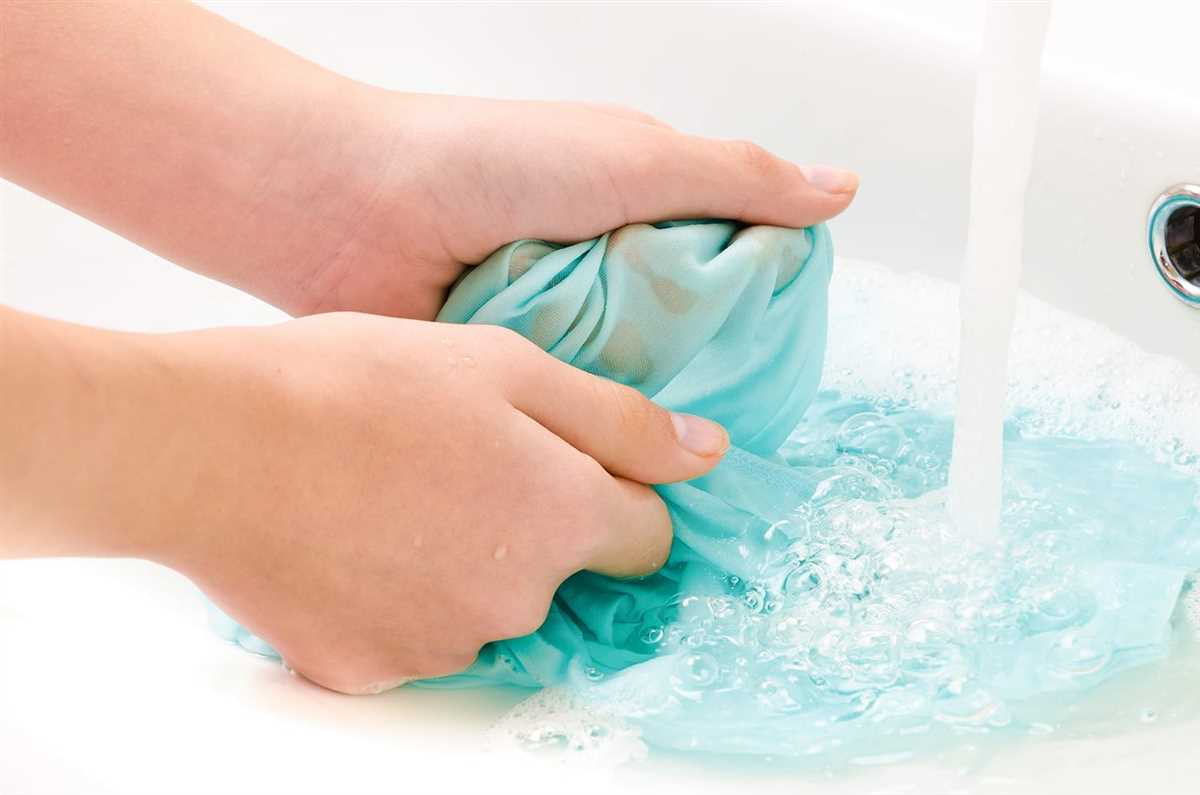
- Rinse the Stained Area: Rinse the pre-treated area with cold water. This will help to remove any loosened residue and prevent the stain from setting during the wash cycle.
- Inspect the Stain: Check the stained area to see if the pre-treatment was successful. If the stain is still visible, repeat the pre-treatment steps before proceeding to wash the garment.
Important Tips
- Act quickly: The sooner you pre-treat a stain, the better chance you have of fully removing it.
- Read the labels: Different fabrics and stains may require different pre-treatment methods, so be sure to read the care instructions and product labels carefully.
- Test before treating: Before applying any stain remover or laundry detergent, test it on a small, inconspicuous area of the fabric to ensure it doesn’t cause any damage or discoloration.
- Patience is key: Some stains may require multiple pre-treatments and wash cycles to fully remove, so don’t get discouraged if it doesn’t come out on the first try.
By following these steps and taking the time to pre-treat stains before washing, you can increase the chances of successfully removing even the toughest stains from your clothes.
Why Pre-Treat Stains?
Pre-treating stains before washing your clothes is an essential step in ensuring that your garments come out clean and stain-free. While it might be tempting to simply toss your stained items into the washing machine, this can often lead to disappointment when the stain remains after the wash cycle.
Pre-treating stains helps to break apart the stain particles and loosen them from the fabric. This makes it easier for the detergent to penetrate the stain and lift it away during the washing process. Without pre-treatment, stains can set into the fabric and become more difficult to remove, leaving a permanent mark on your clothing.
Another reason to pre-treat stains is to prevent them from spreading. Certain types of stains, such as oil or grease, have a tendency to spread when exposed to water or the agitation of the washing machine. By pre-treating these stains, you can contain them and prevent them from spreading to other areas of the garment.
Pre-treating stains also gives your detergent a head start in removing the stain. By applying a stain remover or pre-treatment solution directly to the stain, you are allowing the detergent to work more effectively and efficiently. This can help ensure that the stain is completely removed during the wash cycle.
In addition to improving stain removal, pre-treating stains also helps to preserve the quality and longevity of your clothes. By removing stains before they have a chance to set into the fabric, you can extend the life of your garments and keep them looking their best for longer.
Overall, pre-treating stains is an important step in the laundry process. It can help improve stain removal, prevent stains from spreading, and preserve the quality of your clothing. So next time you encounter a stain, take the time to pre-treat it before tossing it into the washing machine. Your clothes will thank you!
Step 1: Identify the Stain
Before you can effectively pre-treat a stain, you need to identify what type of stain it is. This will help you determine the best method and products to use for pre-treatment.
Stains can be categorized into different types, such as oil-based stains, water-based stains, protein-based stains, dye-based stains, and combination stains. Each type requires a specific approach for pre-treating.
- Oil-based stains: These stains are caused by substances like grease, oil, or makeup. They have a greasy texture and can leave residue on fabrics.
- Water-based stains: Examples of water-based stains include coffee, tea, or juice spills. These stains often leave a noticeable color behind.
- Protein-based stains: Stains from protein-based substances like blood, sweat, or food can be challenging to remove if not treated properly.
- Dye-based stains: These stains are caused by colored substances, such as ink or dye. They can penetrate the fabric and leave a permanent mark if not treated promptly.
- Combination stains: Some stains may be a combination of different types, making them more difficult to remove. An example is a spaghetti sauce stain, which combines oil and tomato sauce.
By understanding the type of stain you are dealing with, you can choose the appropriate pre-treatment method. This will increase the chances of completely removing the stain during the washing process.
Step 2: Choose the Right Pre-Treatment Method
Once you have identified the type of stain you are dealing with, it’s important to choose the right pre-treatment method to effectively remove the stain. Different stains require different approaches, so here are some common pre-treatment methods:
- Water-based stains: For stains like coffee, tea, or juice, start by rinsing the stained area with cold water to minimize the discoloration. Then, apply a small amount of liquid detergent directly to the stain and gently rub it in.
- Oil-based stains: For grease, oil, or salad dressing stains, blot the excess with a paper towel or a clean cloth. Then, sprinkle a generous amount of talcum powder, cornstarch, or baby powder onto the stain and let it sit for about 15 minutes. Afterward, brush off the powder and proceed to wash as usual.
- Protein-based stains: Stains caused by blood, sweat, or food containing proteins should be treated differently. Soak the stained garment in cold water for about 30 minutes, then gently rub the stain with liquid detergent. Afterward, rinse the garment thoroughly before washing.
- Ink stains: Ink stains can be quite stubborn, but treating them properly can increase the chances of successful removal. Place a clean towel under the stained area to prevent the ink from transferring to other parts of the garment. Apply rubbing alcohol or an ink remover directly onto the stain and let it sit for a few minutes. Then, gently blot the stain with a clean cloth until the ink is transferred onto the cloth. Rinse the area with water and proceed to wash.
These are just a few examples of pre-treatment methods, and there are many more depending on the type of stain you are dealing with. Remember to always read the care labels on your garments before attempting any pre-treatment method, as certain fabrics may require special care. With the right pre-treatment method, you can effectively remove stains and keep your clothes looking fresh and clean.
Step 3: Apply the Pre-Treatment
Once you have identified the type of stain and selected the appropriate pre-treatment product, it’s time to apply it to the stained area before washing.
1. Read the Instructions
Before applying the pre-treatment product, carefully read the instructions on the label. This will help you understand the specific application instructions and any precautions you need to take.
2. Test on a Small Area
It’s always a good idea to test the pre-treatment product on a small, inconspicuous area of the fabric before applying it to the actual stain. This will ensure that the product does not cause any damage or discoloration.
3. Check for Colorfastness
If the fabric is colored or patterned, check for colorfastness by applying a small amount of the pre-treatment product to an inconspicuous area and let it sit for a few minutes. Then, blot it with a clean cloth and check for any color transfer. If there is no color transfer, it is safe to proceed.
4. Apply the Pre-Treatment
Follow the instructions on the product label to determine how to apply the pre-treatment product. In most cases, you will need to apply the product directly to the stained area. Use a clean cloth or sponge to gently rub the product into the fabric, working from the outside of the stain towards the center.
5. Let it Sit
After applying the pre-treatment product, let it sit on the stain for the recommended amount of time. This will allow the product to penetrate and break down the stain before the fabric is washed.
6. Reapply if Necessary
If the stain is particularly stubborn or if it is not completely removed after the initial application of the pre-treatment product, you may need to reapply and repeat the process.
7. Proceed to Washing
Once the pre-treatment product has had time to work on the stain, you can proceed to wash the fabric as usual. Follow the garment’s care instructions for washing, using the appropriate water temperature and cycle settings.
By following these steps to apply the pre-treatment product, you can effectively treat stains before washing and increase the chances of successfully removing them from your garments.
Step 4: Let the Pre-Treatment Work
After applying the pre-treatment solution to the stain, it’s important to let it work its magic. Give the solution enough time to penetrate the fabric and break down the stain before moving on to the next step. This will help ensure that the stain is fully removed during the washing process.
The amount of time needed for the pre-treatment solution to work will vary depending on the type and severity of the stain. In general, it’s recommended to let the solution sit on the stain for at least 15-30 minutes. However, for particularly stubborn or set-in stains, you may need to let it sit for longer – up to an hour or more.
During this waiting period, it’s best to avoid touching or agitating the stain. This could potentially spread the stain or push it deeper into the fabric. Instead, simply let the fabric rest undisturbed while the pre-treatment solution does its job.
If you’re treating multiple stains on the same garment, it’s important to keep the treated areas separate to avoid any cross-contamination. Use a clean cloth or paper towel to cover the pre-treated stains, making sure they don’t come into contact with each other.
While you’re waiting, it’s a good idea to check the care label on the garment to ensure that it can be safely washed. Some fabrics may require special handling or professional cleaning, so it’s important to follow the manufacturer’s instructions.
Once the recommended waiting time has passed, you can proceed to the next step of the stain removal process – washing the garment as usual.
FAQ
Why is pre-treating stains important before washing?
Pre-treating stains before washing is important because it helps to loosen and remove the stain particles from the fabric. This can help to ensure that the stain is completely removed during the washing process, rather than setting into the fabric and becoming more difficult to remove.
What are some common household items that can be used for pre-treating stains?
There are several common household items that can be used for pre-treating stains. Some examples include liquid dish soap, white vinegar, hydrogen peroxide, and baking soda. These items can be effective at breaking down and removing various types of stains.
Is it necessary to pre-treat all types of stains?
While pre-treating stains is generally recommended, it may not be necessary for all types of stains. Some stains, such as fresh food stains or light dirt stains, may be effectively removed during the regular washing process without pre-treatment. However, for more stubborn or set-in stains, pre-treating can significantly increase the chances of complete stain removal.
What is the best method for pre-treating stains?
The best method for pre-treating stains depends on the type of stain and the fabric. However, a common method is to apply a pre-treating solution directly to the stain, gently rub it in with a clean cloth or sponge, and then let it sit for a few minutes before washing. It’s important to follow the instructions on the stain remover product and test it on a small, inconspicuous area of the fabric before applying it to the entire stain.


