

Over time, mineral deposits can build up in your shower head, causing it to become clogged and function less efficiently. This can result in reduced water pressure and uneven water distribution, making your shower experience less enjoyable. Fortunately, descaling your shower head is a simple and cost-effective solution to restore its performance.
Descaling a shower head involves removing the mineral deposits that have accumulated on its surface. This can be done using common household ingredients and tools, making it an easy DIY project. In this step-by-step guide, we will walk you through the process of descaling your shower head to help you maintain a clean and efficient shower system.
The first step is to gather the necessary materials. You will need distilled white vinegar, a plastic bag or container large enough to hold the shower head, a rubber band or zip tie, an old toothbrush, and a cloth. You may also want to use gloves to protect your hands from the vinegar.
Once you have gathered the materials, the next step is to remove the shower head. This can usually be done by unscrewing it from the shower arm. If the shower head is stubborn and difficult to remove, you can use a pair of pliers or an adjustable wrench for extra leverage. Be sure to wrap a cloth around the shower arm to protect it from scratches.
Why descaling your shower head is important
- While you might not think about it, your shower head can become clogged with mineral deposits over time.
- These deposits, which are often caused by hard water, can reduce the water flow from your shower head and decrease its effectiveness.
- By descaling your shower head regularly, you can remove these mineral deposits and maintain a strong, consistent water flow.
- Proper water flow is important for a better shower experience, as it ensures that water reaches all parts of your body efficiently.
- A clean shower head can also help prevent the growth of bacteria and mildew, ensuring a healthier shower environment.
- Furthermore, descaling your shower head can prolong its lifespan and prevent potential issues such as leaks or malfunctioning.
Overall, descaling your shower head is an essential maintenance task that can improve your shower experience, promote hygiene, and extend the life of your shower head. It is a simple process that can be done with basic household ingredients and minimal effort.
Tools and materials needed for descaling

- A bucket or basin
- A wrench or pliers
- Vinegar or a descaling solution
- A cloth or sponge
- A toothbrush or small brush
- A plastic bag or rubber band (optional)
When descaling your shower head, you will need a few tools and materials to get the job done effectively. Here is a list of what you will need:
- A bucket or basin: This will be used to catch any excess water that may flow out during the descaling process.
- A wrench or pliers: These tools will be necessary for removing the shower head from the shower arm.
- Vinegar or a descaling solution: This is the main ingredient used to dissolve mineral build-up on the shower head. Vinegar is a common and cost-effective option, but you can also use a descaling solution specifically designed for this purpose.
- A cloth or sponge: This will be used to wipe down the shower head and remove any loose debris or grime.
- A toothbrush or small brush: You will need a small brush to scrub away any stubborn mineral deposits that vinegar or a descaling solution alone may not be able to remove.
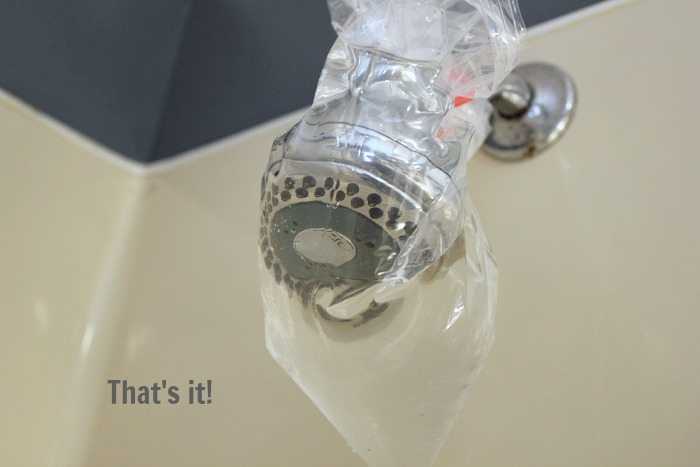
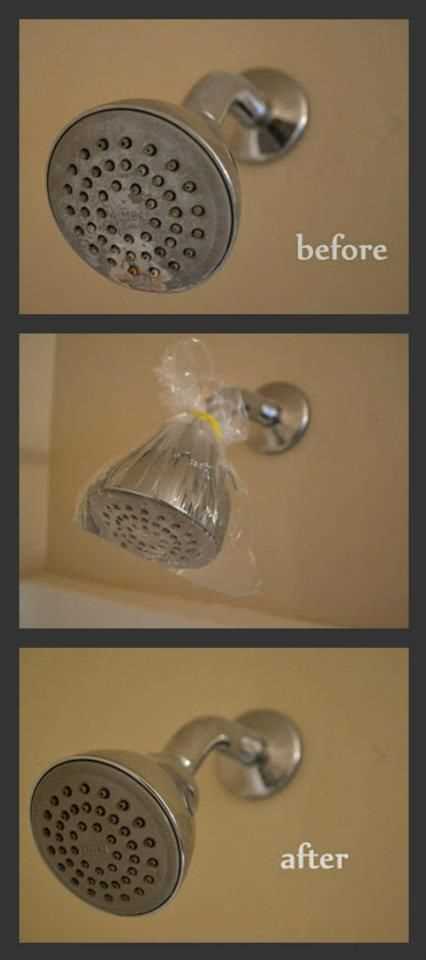
- A plastic bag or rubber band (optional): If you prefer a hands-free method, you can use a plastic bag filled with vinegar or descaling solution and secure it around the shower head with a rubber band. This allows for a longer soak to dissolve tougher mineral build-up.
Make sure you have all these tools and materials ready before you begin descaling your shower head. This will make the process smoother and more efficient.
Step 1: Remove the shower head
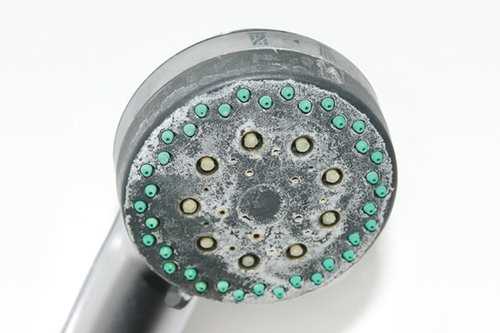
Before you can descale your shower head, you will need to remove it from the shower arm. Follow these steps to safely remove the shower head:
- Turn off the water supply to the shower. Locate the shut-off valve near the shower or use the main water shut-off valve for your home.
- Using a towel or a pair of channel-lock pliers, grip the shower head firmly and rotate it counterclockwise.
- If the shower head is stuck or difficult to remove, you can use a wrench to provide extra leverage. Wrap a cloth around the shower head to protect the finish before using the wrench.
- Continue loosening the shower head until you can unscrew it by hand. Be careful not to damage the shower arm while removing the shower head.
- Once the shower head is removed, set it aside in a safe place.
Now that you have successfully removed the shower head, you can move on to the next steps of descaling and cleaning it.
Step 2: Prepare the descaling solution
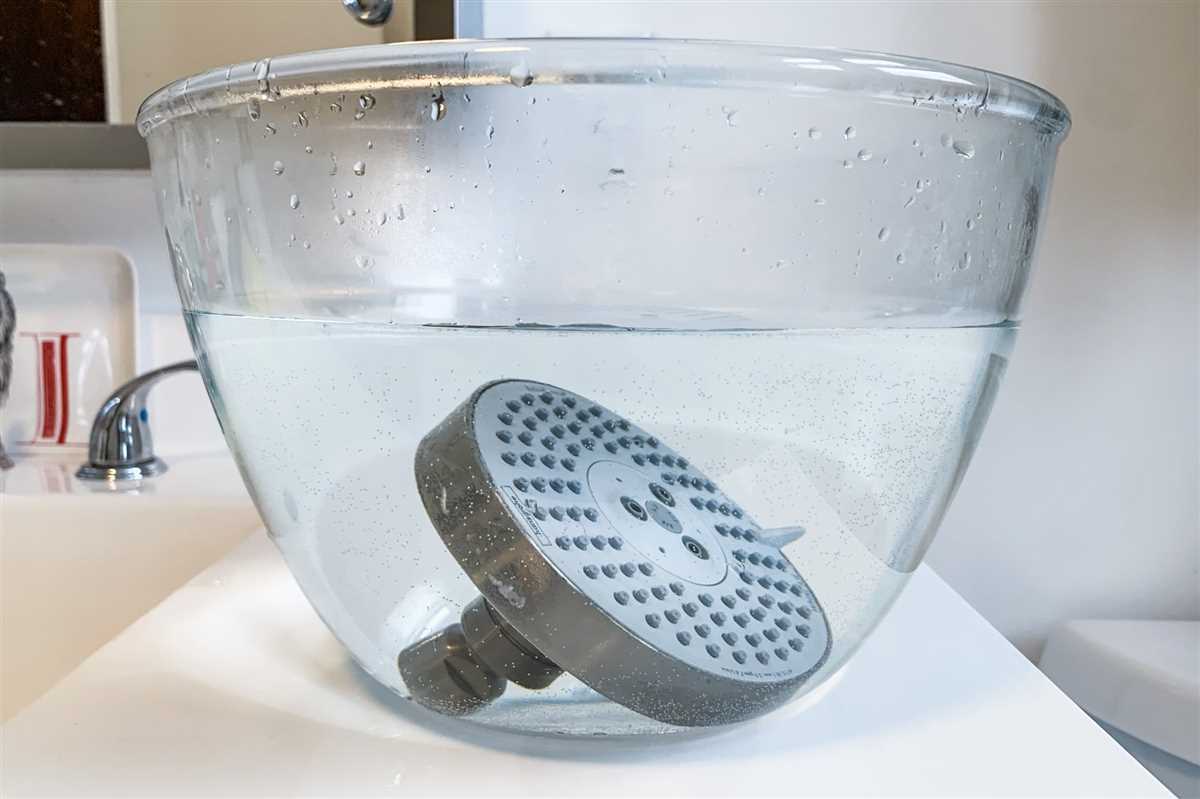
Before you start descaling your shower head, you’ll need to prepare a descaling solution. There are different options available for descaling solutions, but one popular choice is using vinegar due to its effective descaling properties.
To prepare the descaling solution, follow these steps:
- Gather your supplies: You will need white vinegar, a bucket or bowl, and a plastic bag or zip tie.
- Measure the vinegar: Depending on the size of your shower head, measure an appropriate amount of white vinegar. A common ratio is one part vinegar to one part water.
- Pour the vinegar: Pour the measured amount of vinegar into the bucket or bowl.
- Dilute with water (optional): If you prefer a milder solution, you can dilute the vinegar with an equal amount of water.
Note: If you have a metal shower head, it is crucial to avoid using any descaling solution that contains acid. Acid can damage the metal surface and lead to corrosion.
Once you have prepared the descaling solution, you are ready to move on to the next step: applying the descaling solution to your shower head.
Step 3: Soak the shower head in the solution
Fill a bowl or a bucket with the descaling solution of your choice. Make sure to follow the instructions on the product label for the recommended dilution ratio.
Submerge the shower head into the solution, ensuring that it is completely covered. If the shower head cannot be fully submerged, you can use a plastic bag or a ziplock bag to cover it and secure it tightly with a rubber band.
Allow the shower head to soak in the solution for the recommended amount of time. This can vary depending on the severity of the mineral deposits and the product you are using. It is usually recommended to soak for at least 30 minutes to an hour.
While the shower head is soaking, take this opportunity to clean other parts of your bathroom or perform any other tasks you need to do.
After the recommended soaking time has passed, remove the shower head from the solution and rinse it thoroughly with clean water. Use a brush or an old toothbrush to scrub away any remaining mineral deposits.
Once all the mineral deposits have been removed, reattach the shower head to the shower arm and turn on the water to flush out any remaining debris.
Your shower head should now be free from mineral deposits and functioning optimally.
FAQ
Why is it important to descale a shower head?
It is important to descale a shower head because mineral buildup can clog the small openings in the shower head, resulting in reduced water flow. Descaling helps to remove these deposits and restore proper water flow.
What materials do I need to descale a shower head?
To descale a shower head, you will need a plastic bag, rubber bands, white vinegar, a toothbrush, and a cloth or sponge.
Can I use any other liquid instead of white vinegar?
Yes, you can use lemon juice as an alternative to white vinegar. The citric acid in lemon juice can also help to dissolve the mineral deposits.
How often should I descale my shower head?
The frequency of descaling depends on the hardness of your water and the amount of mineral buildup. As a general guideline, it is recommended to descale a shower head every 4-6 months to maintain optimal performance.
Is it safe to descale a shower head with vinegar?
Yes, it is safe to descale a shower head with vinegar. Vinegar is non-toxic and does not pose any harm to your skin or health. However, it is recommended to wear gloves when handling vinegar and to ensure proper ventilation in the bathroom.
Can I use a descaling solution instead of vinegar?
Yes, you can use a commercially available descaling solution instead of vinegar. Follow the instructions on the product label for proper usage. However, vinegar is a cost-effective and natural alternative that can achieve similar results.

