How to Clean High-Gloss Kitchen Units: A Step-by-Step Guide


Keeping your high-gloss kitchen units sparkling clean can be a challenge, but with the right techniques and tools, it’s a task that can be easily achieved. High-gloss kitchen units are popular for their sleek and shiny appearance, but they can also be prone to showing fingerprints, watermarks, and smudges. Regular cleaning is essential to maintain their aesthetic appeal and prolong their lifespan.
In this step-by-step guide, we will walk you through the process of cleaning high-gloss kitchen units effectively. We will cover everything from gathering the necessary supplies to tackling common cleaning issues. By following our tips, you can ensure that your high-gloss kitchen units stay looking their best for years to come.
Before you begin cleaning your high-gloss kitchen units, it’s important to gather the right supplies. You will need a gentle cleaner or a mixture of mild dish soap and warm water, a soft microfiber cloth, a non-abrasive sponge or brush, and a clean towel or paper towel. Avoid using harsh or abrasive cleaners, as they can damage the glossy finish.

Now that you have your supplies ready, it’s time to start cleaning. Begin by wiping down the surfaces of your high-gloss kitchen units with a damp microfiber cloth. This will remove any loose dirt or dust. Next, dip a non-abrasive sponge or brush into the gentle cleaner or dish soap mixture and gently scrub the surface in circular motions. Be sure to pay attention to any areas with stubborn stains or build-up.
Preparing the Cleaning Solution
Before you start cleaning your high-gloss kitchen units, it is important to prepare a suitable cleaning solution. The cleaning solution you choose should be gentle enough to avoid damaging the glossy surface, but effective enough to remove any grease or grime.
Step 1: Gather the Necessary Supplies
To prepare the cleaning solution, gather the following supplies:
- A mild dish soap or kitchen cleaner
- A bucket or basin
- Warm water
- A microfiber cloth or sponge
Step 2: Mix the Cleaning Solution
Fill the bucket or basin with warm water. Add a small amount of mild dish soap or kitchen cleaner to the water. Be sure to follow the instructions on the cleaning product for the correct dilution ratio.
Note: It is important to avoid using harsh cleaning products or abrasive materials, as they can damage the high-gloss finish.
Step 3: Stir the Solution

Gently stir the cleaning solution with your hand or a spoon to ensure that the soap or cleaner is evenly mixed with the water.
Step 4: Test the Solution

Before applying the cleaning solution to the entire surface of your high-gloss kitchen units, it is recommended to test it on a small, inconspicuous area. This will help you ensure that the solution does not cause any discoloration or damage to the glossy finish.
Note: If the cleaning solution causes any adverse reactions or damage to the surface, discontinue use immediately.
Step 5: Prepare the Cleaning Cloth or Sponge
If using a microfiber cloth, dampen it with the cleaning solution. If using a sponge, you can either dip it directly into the solution or apply the solution to the sponge using a spray bottle.
Note: It is important to avoid using excessively wet cleaning cloths or sponges, as the excess moisture can damage the high-gloss finish.
Now that you have prepared the cleaning solution, you are ready to proceed to the next step, which is cleaning the high-gloss kitchen units.
Removing Dust and Grime
To keep your high-gloss kitchen units looking pristine, it’s essential to regularly remove dust and grime. Follow these steps to effectively clean your units:
-
Gather your materials: Before you begin cleaning, gather all the necessary materials. You will need a microfiber cloth, warm water, mild dish soap, and a clean bowl.
-
Prepare the cleaning solution: Fill the clean bowl with warm water and add a few drops of mild dish soap. Mix it gently to create a soapy solution.
-
Start with dry dusting: Using a clean microfiber cloth, start by dry dusting the high-gloss kitchen units. This will remove any loose dirt or debris on the surface.
-
Dampen the cloth: Dip the microfiber cloth into the soapy water solution, making sure it is damp but not soaking wet.
-
Wipe the units: Gently wipe the damp cloth over the high-gloss kitchen units, applying light pressure. Make sure to cover the entire surface, including any grooves or ridges.
-
Pay attention to stubborn stains: For any stubborn stains or dried-on grime, you may need to apply a bit more pressure or use a gentle scrub brush. Be careful not to scratch the surface.
-
Rinse and dry: Once you have cleaned all the units, rinse the cloth with clean water and wipe over the surface to remove any soap residue. Then, use a dry microfiber cloth to thoroughly dry the units and remove any remaining moisture.
By regularly removing dust and grime from your high-gloss kitchen units, you can ensure they stay shiny and clean for years to come.
Cleaning the Glass Surfaces
Cleaning the glass surfaces on your high-gloss kitchen units requires special care to avoid scratches or damage. Follow these steps to ensure an effective and safe cleaning process:
- Start by removing any excess dirt or grime from the glass surface. Use a soft cloth or brush to gently brush away any loose debris.
- Mix a solution of mild dish soap and warm water in a bucket or bowl. Avoid using harsh chemicals or abrasive cleaners as they can damage the high-gloss finish or leave streaks on the glass.
- Dip a microfiber cloth or sponge into the soapy solution and wring out any excess liquid. The cloth should be damp but not dripping wet.
- Gently wipe the glass surface with the damp cloth, using long, even strokes. Start from the top and work your way down to ensure complete coverage.
- If there are any stubborn stains or grime on the glass, you can use a glass cleaner specifically designed for high-gloss surfaces. Spray the cleaner onto a soft cloth or directly onto the glass, and then wipe away the stain with gentle circular motions.
- After cleaning, use a dry, lint-free cloth to buff the glass surface and remove any remaining moisture or streaks. This will leave the glass looking shiny and streak-free.
- For stubborn residue or fingerprints that are difficult to remove, you can use a glass polishing compound. Apply a small amount of the compound to a clean, dry cloth and gently rub it onto the glass surface in circular motions. Then, buff the glass with a dry cloth to remove the residue.
Remember to always test any cleaning products on a small, inconspicuous area of the glass surface before applying them to the entire unit. This will help to ensure that the product does not cause any damage or discoloration.
Regularly cleaning and maintaining the glass surfaces of your high-gloss kitchen units will help to keep them looking pristine and extend their longevity.
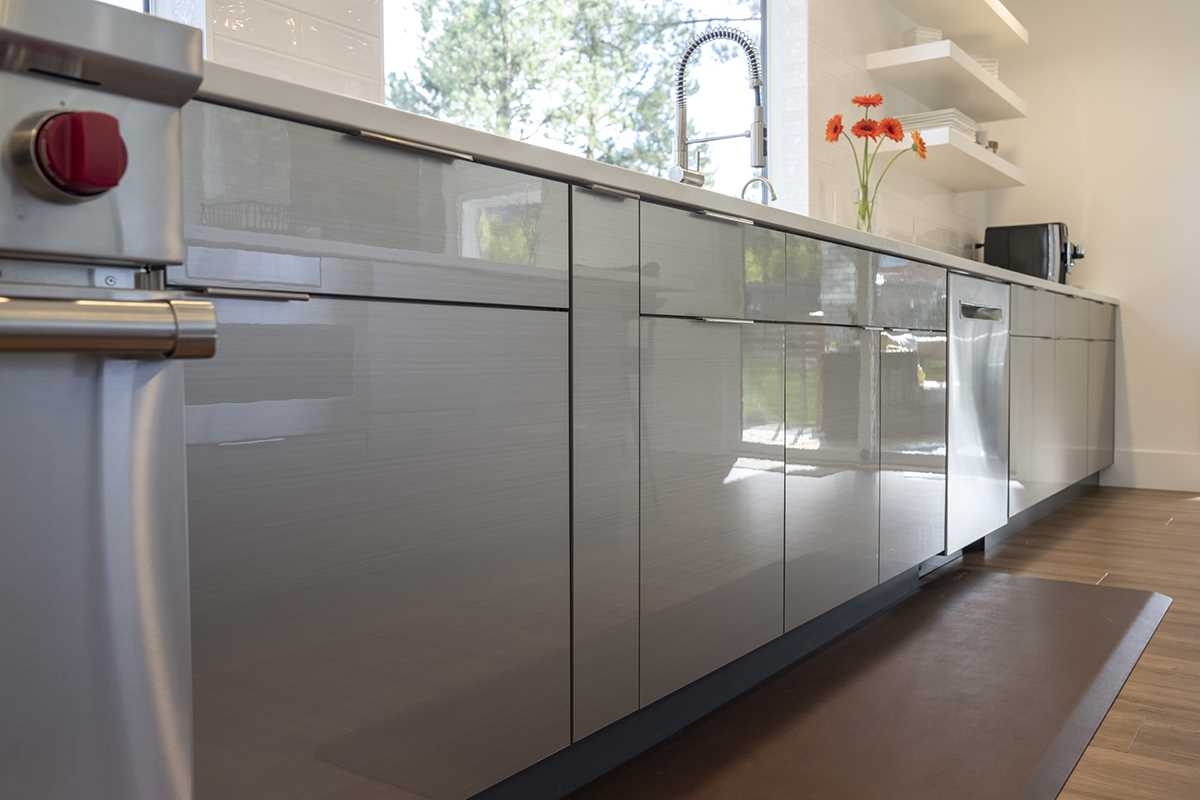
Wiping Down the Cabinet Doors

Wiping down the cabinet doors is an essential part of cleaning high-gloss kitchen units. Regularly wiping them down keeps the doors looking shiny and free from dirt and grease. Follow these steps to effectively clean your high-gloss cabinet doors:
- Gather the necessary supplies: Before you start cleaning, gather all the supplies you will need. This includes a bucket, warm water, mild detergent or dish soap, a microfiber cloth or sponge, and a dry, lint-free cloth.
- Dilute the detergent: Fill the bucket with warm water and add a small amount of mild detergent or dish soap. Mix it gently until it creates a soapy solution.
- Start with the top cabinets: Begin by wiping down the top cabinets. Dip the microfiber cloth or sponge into the soapy water and wring out the excess liquid. Gently wipe each cabinet door, paying special attention to any areas with visible dirt or stains. Be sure to clean all sides of the door, including the edges and handles.
- Move to the bottom cabinets: Once the top cabinets are clean, move on to the bottom ones. Follow the same process of dipping the cloth or sponge into the soapy water and wiping each cabinet door.
- Rinse the cloth or sponge: Periodically rinse the cloth or sponge in clean, warm water to remove any dirt or soap residue. Wring it out well before continuing to wipe down the cabinet doors.
- Dry the cabinet doors: After wiping down each cabinet door, dry it immediately with a dry, lint-free cloth. This helps prevent water spots or streaks from forming on the glossy surface.
- Inspect for streaks or marks: Once all the cabinet doors are dry, inspect them for any streaks or marks. If you notice any, use a clean, dry cloth to buff them out gently.
Cleaning high-gloss kitchen cabinet doors requires gentle care and regular maintenance. Remember to always use mild detergents or dish soaps, as harsh chemicals may damage the glossy finish. By following these steps, you can ensure that your high-gloss cabinet doors stay beautiful and shiny for years to come.
Polishing and Maintaining the Glossy Finish

Once you have cleaned your high-gloss kitchen units, it is important to polish them to maintain their shiny appearance. Here are the steps to follow:
1. Gather the necessary materials

- Microfiber cloth or soft cotton cloth
- Non-abrasive polish or wax specifically designed for high-gloss surfaces
- Glass cleaner
- Warm water
2. Dust and wipe down the surfaces
Before applying any polish or wax, make sure to remove any dust or dirt from the surfaces of your kitchen units. Use a dry microfiber cloth or a soft cotton cloth to gently wipe down the cabinets and countertops.
3. Apply the polish or wax

Using a clean and dry microfiber cloth, apply a small amount of the non-abrasive polish or wax specifically designed for high-gloss surfaces onto the cloth. Start by applying the polish to a small, inconspicuous area to test for any adverse reactions.
Rub the polish onto the surfaces in a circular motion, applying even pressure. Make sure to cover the entire surface, including any edges or corners. Avoid applying too much polish, as this can leave a residue or streaks.
4. Buff the surfaces
After applying the polish, use a clean part of the microfiber cloth to gently buff the surfaces. Again, use a circular motion and apply even pressure. This will help to remove any excess polish and bring out a high shine.
5. Clean the glass components
If your high-gloss kitchen units have any glass components, such as doors or shelves, clean them separately using a glass cleaner. Spray the glass cleaner onto a microfiber cloth and wipe down the glass surfaces, making sure to remove any smudges or fingerprints.
6. Maintain the glossy finish
To keep your high-gloss kitchen units looking their best, it is important to maintain them regularly. Here are some tips:
- Wipe down the surfaces daily with a soft cloth to remove any spills or stains.
- Avoid using abrasive sponges or cleaning products that could scratch the glossy finish.
- Use a mild detergent mixed with warm water to clean any stubborn stains.
- Immediately wipe away any grease or oil spills to prevent staining.
- Avoid placing hot pots or pans directly onto the glossy surfaces to prevent any heat damage.
By following these steps and maintaining your high-gloss kitchen units, you can enjoy their shiny and elegant appearance for years to come.
FAQ
What is a high-gloss kitchen unit?
A high-gloss kitchen unit is a type of kitchen cabinet or cupboard that has a smooth and shiny finish. It is typically made from a material such as acrylic or laminate and is popular in modern kitchen designs.
Why should I clean my high-gloss kitchen units?
It is important to clean high-gloss kitchen units regularly to maintain their appearance and prolong their lifespan. Grease, dirt, and grime can build up on the surface over time, making the units look dull and less aesthetically pleasing.
What materials do I need to clean high-gloss kitchen units?
To clean high-gloss kitchen units, you will need a soft microfiber cloth, warm soapy water or a gentle kitchen cleaner, a clean bucket, and a dry cloth for drying. Avoid using abrasive cleaners or scrub brushes, as they can damage the glossy finish.
Can I use vinegar to clean high-gloss kitchen units?
No, it is not recommended to use vinegar to clean high-gloss kitchen units. Vinegar is an acidic substance that can dull or etch the glossy finish. It is best to use a mild dish soap or a kitchen cleaner specifically designed for high-gloss surfaces.