
Easy Steps to Remove Mould from Bathroom Sealant – Ultimate Guide


Mould is a common problem in bathrooms, especially in areas where moisture is present. One of the most common places where mould can grow is in the bathroom sealant. Mould not only looks unsightly, but it can also be harmful to your health. If left untreated, it can spread and cause damage to the sealant and surrounding areas. However, removing mould from bathroom sealant is not a difficult task if you follow these easy steps.
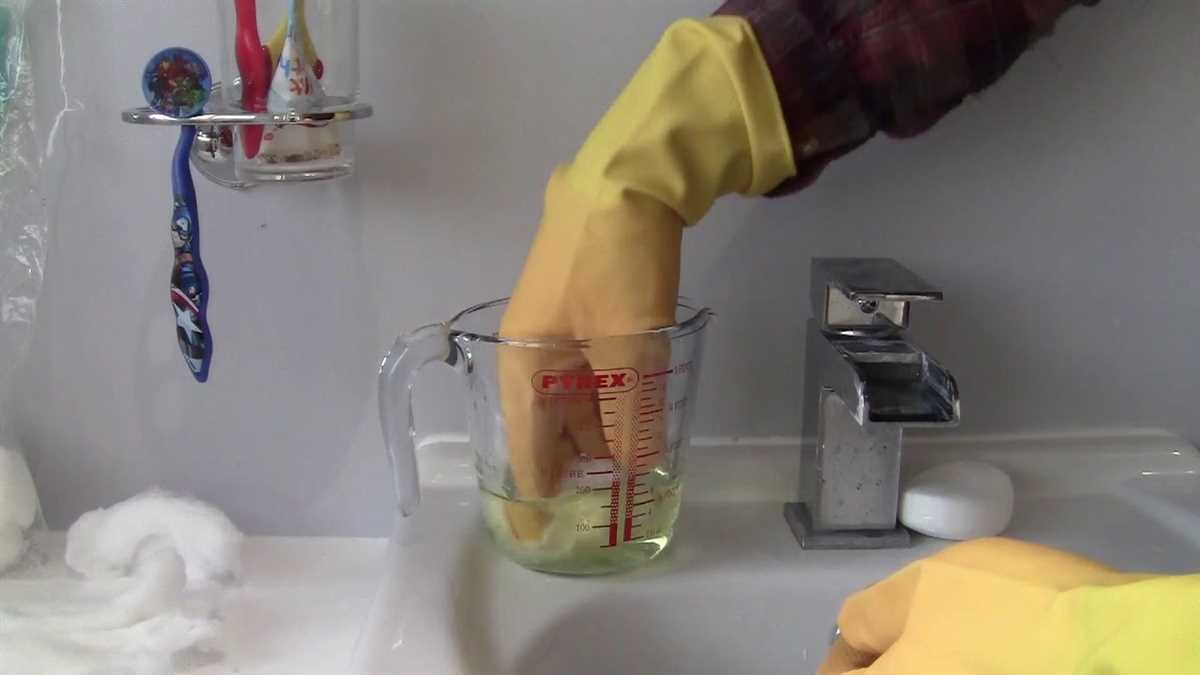
Step 1: Safety First
Before you start the mould removal process, it is important to take necessary safety precautions. Put on gloves, goggles, and a face mask to protect yourself from the harmful spores released by mould.
Step 2: Preparing the Cleaning Solution
In order to remove mould effectively, you need to prepare a cleaning solution. Mix equal parts of bleach and water in a spray bottle. Alternatively, you can use a mould removal product specifically designed for bathroom sealant.
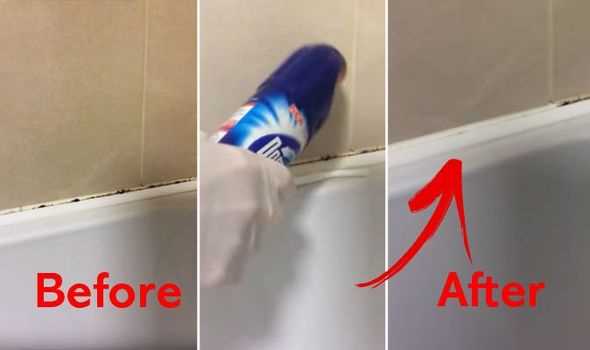
Step 3: Spraying the Solution
Thoroughly spray the cleaning solution onto the mouldy areas of the bathroom sealant. Make sure to cover all the affected areas and allow the solution to sit for at least 15 minutes. This will help to kill the mould and loosen it from the sealant.
Step 4: Scrubbing the Sealant
After the solution has had time to work, use a scrub brush or an old toothbrush to scrub the sealant. Apply firm but gentle pressure to remove the mould from the surface. Make sure to reach into any crevices or corners where mould may be hiding.
Step 5: Rinse and Dry
Once you have thoroughly scrubbed away the mould, rinse the sealant with warm water to remove any leftover cleaning solution. Use a clean cloth or towel to dry the sealant completely. Ensuring that the sealant is dry will help to prevent future mould growth.
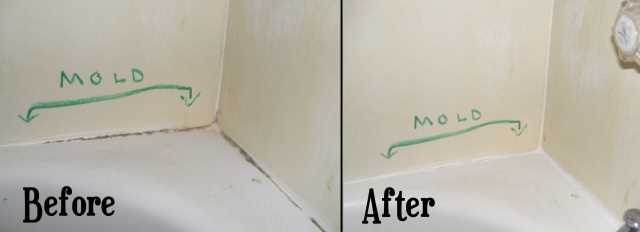
In conclusion, removing mould from bathroom sealant is a relatively easy process if you follow these steps. Taking necessary safety precautions, preparing a cleaning solution, thoroughly spraying the solution, scrubbing the sealant, and rinsing and drying are all essential steps in removing mould effectively. By regularly cleaning your bathroom sealant and preventing moisture buildup, you can keep mould growth at bay.
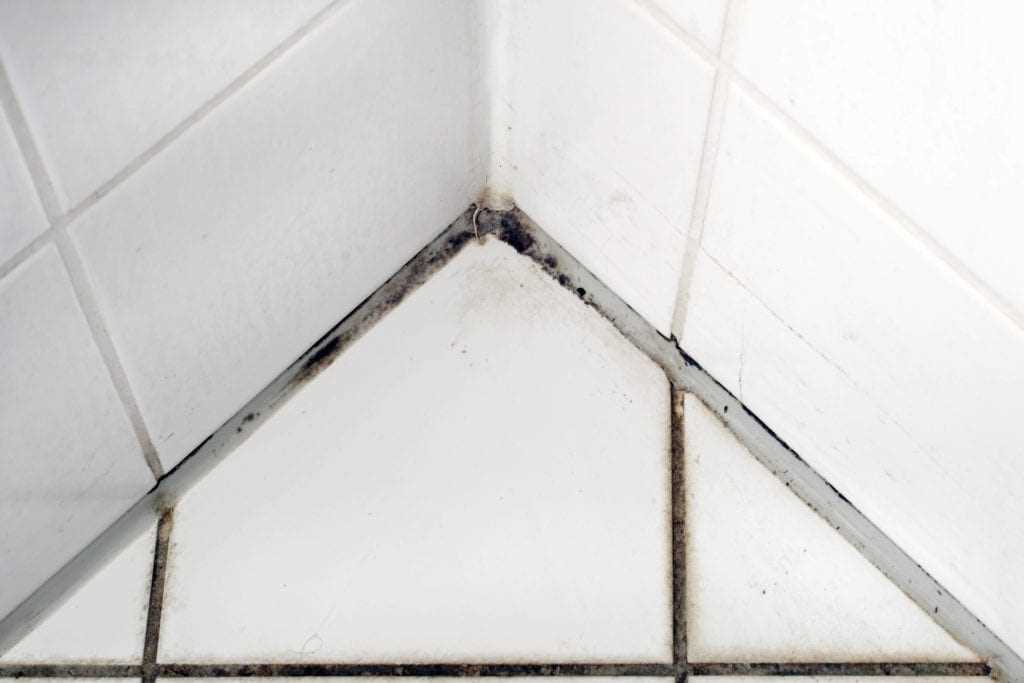
Identify the Presence of Mould on Bathroom Sealant
One of the first steps in removing mould from bathroom sealant is to identify its presence. Mould can easily develop in damp and humid environments, making the bathroom an ideal breeding ground. Here are some signs that indicate the presence of mould on your bathroom sealant:
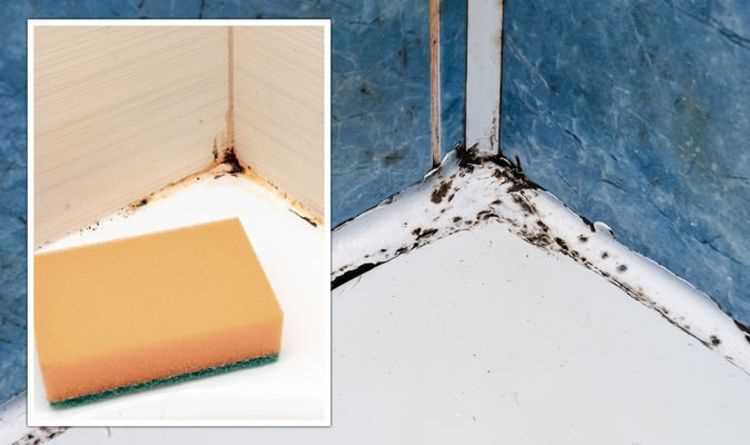
- Visible black or dark green spots: Mould often appears as small black or dark green spots on the sealant. These spots may start small and gradually spread if left untreated.
- Musty odor: Mould releases a distinctive musty smell, which can be easily detected in the bathroom. If you notice an unpleasant odor, it could be a sign of mould growth.
- Discoloration: The presence of mould can cause the sealant to discolor and appear darker than usual. This is especially noticeable in areas where water is frequently present.
- Texture change: Mould-infested sealant may become soft, spongy, or crumbly to the touch. If you notice any changes in the texture, it is likely due to mould growth.
- Allergic reactions: Some people may experience allergic reactions when exposed to mould, such as sneezing, coughing, or skin irritation. If you or your family members experience these symptoms in the bathroom, it could indicate the presence of mould.
If you notice any of these signs, it is important to take immediate action to remove the mould and prevent it from spreading further. Ignoring mould growth can lead to potential health risks and damage to the bathroom sealant.
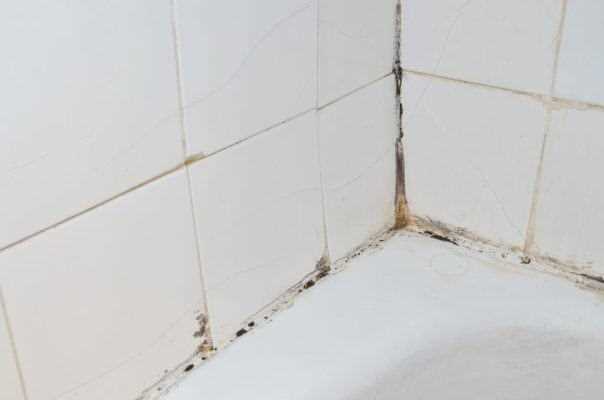
How to Spot Mould Growth on Bathroom Sealant
Mould is a common problem in many bathrooms, and it often develops in the sealant around your bathtub, shower, or sink. It can be difficult to spot mould growth, as it may start off as small spots or discoloured patches that are easily overlooked. Here are some ways to identify mould growth on your bathroom sealant:
- Discoloration: Mould often appears as black, green, or dark spots on the sealant. Look for any abnormal discoloration, especially in corners or areas that are frequently exposed to water.
- Musty Odor: If you notice a musty or unpleasant smell in your bathroom, it could be a sign of underlying mould growth. Even if you can’t see any visible signs of mould, the odor may indicate its presence.
- Texture: Mould can create a fuzzy or slimy texture on the sealant. If you notice any unusual textures or growths, it’s likely that mould is present.
- Allergy Symptoms: Some people may experience allergy symptoms when exposed to mould, such as sneezing, coughing, itchy eyes, or a runny nose. If you or your family members consistently have these symptoms in the bathroom, there could be mould present.
It’s important to regularly inspect your bathroom sealant for any signs of mould growth. By catching it early, you can prevent it from spreading and causing further damage. If you do notice mould, take prompt action to remove it and address the underlying moisture issues to prevent future growth.
Prepare the Necessary Materials
To effectively remove mould from bathroom sealant, you will need the following materials:
- Bleach: Use bleach to kill the mould and prevent future growth. Make sure to use a bleach that is safe for use on bathroom sealant.
- Protective Gear: To protect yourself from the bleach and mould spores, wear gloves, safety goggles, and a mask.
- Scrub Brush: Use a stiff-bristle scrub brush to scrub away the mould from the sealant. Make sure the bristles are strong enough to effectively remove the mould without damaging the sealant.
- Old Toothbrush: An old toothbrush can be useful for scrubbing hard-to-reach areas or delicate parts of the sealant.
- White Vinegar: White vinegar is an effective natural cleaner that can help remove mould and prevent future growth. Mix equal parts water and white vinegar in a spray bottle.
- Old Towels or Rags: You will need some old towels or rags to dry the sealant after cleaning.
- Caulking Gun and Silicone Sealant: If the mould is extensive or the sealant is damaged, you may need to remove the old sealant and apply a new one. A caulking gun and silicone sealant will be required for this task.
Before starting the mould removal process, make sure you have all these materials readily available. This will ensure that you can work efficiently and effectively to eliminate the mould problem in your bathroom.
What You Need to Remove Mould from Bathroom Sealant
- Protective Gear: Before you start removing mould from bathroom sealant, make sure to wear protective gear such as gloves, goggles, and a mask to protect yourself from the mould spores.
- Bleach or Vinegar: You will need a cleaning agent to kill the mould. You can use bleach or vinegar for this purpose. Both are effective in removing mould, but bleach is a stronger solution.
- Scrub Brush: A scrub brush with stiff bristles will help you scrub away the mould from the bathroom sealant.
- Old Toothbrush: An old toothbrush can be useful in reaching the tight corners and crevices of the sealant where mould may be hiding.
- Plastic or Cardboard: Place plastic or cardboard sheets around the affected area to protect the surrounding surfaces from any splashes or spills.
- Water: You will need water for rinsing off the cleaning solution and the scrubbed sealant.
- Cloth or Towel: Keep a cloth or towel handy to wipe away excess moisture after rinsing.
- Mould Prevention Products: After removing the mould, consider using mould prevention products to inhibit its future growth. These may include mould-resistant sealants or sprays.
Remove the Old Sealant
Before applying new sealant, it is important to remove the old sealant from the affected area. Follow these steps to effectively remove the old sealant:
- Gather the necessary tools: Before you begin, make sure you have the following tools on hand:
- A utility knife or a sharp blade
- A caulk removal tool or a scraper
- Isopropyl alcohol or a mildew remover
- Old cloth or paper towels
- Cut and scrape the old sealant: Use a utility knife or a sharp blade to carefully cut along the edges of the old sealant. Be cautious not to damage the surrounding surfaces. Once the edges are cut, use a caulk removal tool or a scraper to gently scrape away the old sealant. Take your time and ensure you remove as much of the old sealant as possible.
- Clean the area: After removing the old sealant, clean the area thoroughly to remove any residue or dirt. You can use isopropyl alcohol or a mildew remover to clean the surface effectively. Moisten an old cloth or paper towel with the cleaning solution and wipe down the surface. Make sure to dry it completely before applying new sealant.
- Dispose of the old sealant: Properly dispose of the old sealant. Check with your local waste management guidelines for the correct disposal method.
Removing the old sealant is an essential step to ensure proper adhesion and effectiveness of the new sealant. Taking your time and being careful during this process will help you achieve the best results.
Step-by-Step Guide to Removing Mouldy Bathroom Sealant
1. Prepare the necessary materials
Gather the following materials before you start removing the mouldy bathroom sealant:
- Protective gloves
- Face mask
- Bleach
- Scrub brush
- Old toothbrush
- Plastic scraper
- Disposable cloth or sponge
2. Ensure proper ventilation
Open windows or turn on the bathroom fan to provide adequate ventilation while cleaning the mouldy bathroom sealant. This will help prevent the spread of spores and ensure your safety.
3. Put on protective gear
Wear protective gloves and a face mask to protect your skin and respiratory system from any potentially harmful fumes or skin irritations.
4. Apply bleach to the mouldy sealant
Pour some bleach directly onto the mouldy areas of the bathroom sealant. Make sure to cover the entire affected area thoroughly. Allow the bleach to sit for a few minutes to effectively kill the mould.
5. Scrub the sealant
Using a scrub brush or an old toothbrush, scrub the mouldy sealant in a circular motion. Apply moderate pressure to remove the mould and any stains. Be careful not to damage the surrounding tiles or surfaces. If needed, use a plastic scraper to gently lift off any stubborn mould or residue.
6. Rinse and wipe off the bleach
Once the mould and stains have been removed, rinse the sealant thoroughly with water. Use a disposable cloth or sponge to wipe off any remaining bleach and residue.
7. Dry the area
Use a dry cloth or towel to pat the area dry. Ensure that the bathroom sealant is completely dry before applying any new sealant or moisture-resistant products.
8. Prevent future mould growth
To prevent future mould growth, keep your bathroom well-ventilated by using a fan or opening windows. Clean your bathroom regularly to remove any build-up of moisture and mould. Consider using a mould-resistant bathroom sealant to inhibit the growth of mould.
By following these steps, you can effectively remove mouldy bathroom sealant and keep your bathroom clean and mould-free. Remember to always prioritize safety by using protective gear and proper ventilation during the cleaning process.
Clean and Disinfect the Area
Once you have removed the mold from the bathroom sealant, it is essential to clean and disinfect the area thoroughly to prevent any future growth. Follow these simple steps:
- Gather your cleaning supplies: You will need a disinfectant cleaner, a scrub brush or sponge, rubber gloves, and a clean cloth.
- Prepare the disinfectant solution: Dilute the disinfectant cleaner according to the manufacturer’s instructions. Make sure to use a cleaner that is specifically designed to kill mold and mildew.
- Put on your rubber gloves: Protect your hands from the cleaning chemicals by wearing rubber gloves throughout the cleaning process.
- Apply the disinfectant solution: Use a sponge or scrub brush to apply the disinfectant solution to the affected area. Make sure to cover all the surfaces where mold was present.
- Scrub the area: Use the scrub brush or sponge to scrub the area thoroughly. Pay special attention to any remaining mold stains and scrub them away.
- Rinse with clean water: Once you have scrubbed the area, rinse it thoroughly with clean water to remove any traces of the disinfectant solution.
- Dry the area: Use a clean cloth or towel to dry the area completely. Make sure there is no moisture left, as it can promote mold growth.
- Dispose of any cleaning materials: Safely dispose of the gloves, sponge, and any other cleaning materials used during the process. Mold spores can spread easily, so it’s important to properly dispose of them.
Following these steps will help ensure that your bathroom sealant remains clean and free from mold. Regular cleaning and disinfection are key to preventing mold growth in the future.
FAQ
What causes mould to grow on bathroom sealant?
Mould grows on bathroom sealant due to the presence of moisture, warmth, and lack of ventilation. These conditions create a perfect environment for mould spores to thrive and multiply.
How can I prevent mould growth on my bathroom sealant?
To prevent mould growth on bathroom sealant, it is important to keep the area well-ventilated by opening windows or using exhaust fans. Regularly cleaning and drying the sealant can also help prevent mould growth. Additionally, fixing any leaks or drips in the bathroom can help reduce moisture and prevent mould from forming.
What materials do I need to remove mould from bathroom sealant?
To remove mould from bathroom sealant, you will need a few basic materials such as bleach, a scrub brush or toothbrush, a spray bottle, vinegar, baking soda, and water. These materials will help you effectively clean and remove the mould from the sealant.
Can I use vinegar to remove mould from bathroom sealant?
Yes, vinegar can be used to remove mould from bathroom sealant. Vinegar has natural anti-fungal properties that can help kill and remove mould. Simply mix equal parts of vinegar and water in a spray bottle, spray it onto the mouldy sealant, and scrub the area with a brush or toothbrush.
Is it necessary to scrub the mouldy sealant after applying bleach?
Yes, it is necessary to scrub the mouldy sealant after applying bleach. Bleach helps kill the mould, but scrubbing the sealant helps physically remove the mould and its spores. This ensures a more thorough cleaning and helps prevent regrowth.
What if the mould on my bathroom sealant keeps coming back?
If the mould on your bathroom sealant keeps coming back, it may indicate an underlying moisture problem. Inspect the area for any leaks or water sources, and fix them if necessary. Improving ventilation in the bathroom by using fans or dehumidifiers can also help prevent mould regrowth. Additionally, consider using mould-resistant sealant or regularly applying sealant with anti-mould properties.